Are you eager to use the powerful GPT-Neo 2.7B on Colab, but worried about the limited system resources offered in the free version? Don't fret! We've got you covered. In this article, we'll walk you through a clever technique that allows you to use GPT-Neo 2.7B even if you have low system RAM. With our step-by-step guide, you'll learn how to unleash the full potential of GPT-Neo 2.7B on Colab, regardless of the resource limitations. Get ready to experience the incredible text generation capabilities of GPT-Neo 2.7B without worrying about system requirements!
Step 1: Enabling GPU Acceleration
The first step is to ensure that you have GPU acceleration enabled in your Colab notebook. Follow these simple steps to enable GPU acceleration:
- Click on the "Runtime" menu at the top of the Colab notebook.
- Select "Change runtime type" from the dropdown menu.
- In the "Hardware accelerator" section, choose "GPU" as the hardware accelerator.
- Click the "Save" button to apply the changes.
Enabling GPU acceleration will allow you to take full advantage of the power of your GPU when running GPT-Neo 2.7B, significantly improving performance.
Step 2: Install Required Packages
To get started, we need to install the necessary packages. Open a new Colab notebook and run the following commands in a code cell:
!pip install -U --no-cache-dir transformers
!pip install torch
!pip install accelerate
Step 3: Load the Model and Tokenizer
Import necessary modules:
import torch
from transformers import AutoTokenizer, AutoModelForCausalLM, GPTNeoConfig
Next, let's load the GPT-Neo 2.7B model and tokenizer. Add the following code to a new code cell:
tokenizer = AutoTokenizer.from_pretrained("EleutherAI/gpt-neo-2.7B")

# Create a configuration for the model
config = GPTNeoConfig.from_pretrained('EleutherAI/gpt-neo-2.7B')

# Define a custom model class with gradient checkpointing
class GPTNeoWithCheckpointing(AutoModelForCausalLM):
    def forward(self, *inputs, **kwargs):
        return super().forward(*inputs, **kwargs)

# Instantiate the model with gradient checkpointing
model = GPTNeoWithCheckpointing(config)

# Move the model to GPU
model = model.to('cuda')

# Load the model to GPU
model = model.half()  # Use torch.float16 for reduced memory usage
model = model.to('cuda')
This will install the tokenizer, create a custom model class with gradient checkpointing, and load the GPT-Neo 2.7B model. We move the model to the GPU.
Step 4: Generate Text
Now that we have the model and tokenizer set up, let's generate some text. Add the following code to a new code cell:
# Generate text
input_prompt = "I am Gpt-neo"
input_ids = tokenizer.encode(input_prompt, return_tensors="pt").to('cuda')
generated_output = model.generate(input_ids=input_ids, do_sample=True, max_length=100)
generated_text = tokenizer.decode(generated_output[0], skip_special_tokens=True)

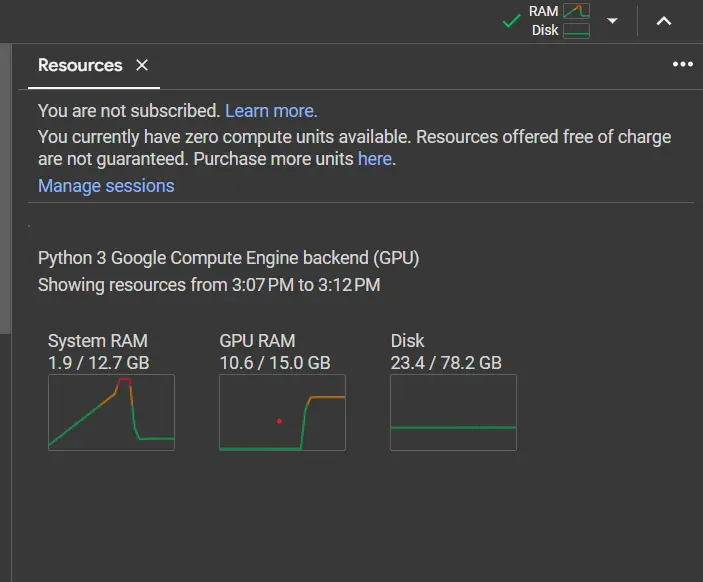
GPT-Neo 2.7B Colab system resource consumption
Why Use Gradient Checkpointing?
Colab provides a limited amount of system RAM (12GB in the free version). Loading large models like GPT-Neo 2.7B can easily exceed this memory limit and cause out-of-memory errors.
To overcome this limitation, we utilize gradient checkpointing. Gradient checkpointing is a technique that allows us to trade off memory usage for computation. It reduces the memory footprint of the model by recomputing intermediate activations during the backward pass, rather than storing them in memory.
By using gradient checkpointing, we can load GPT-Neo 2.7B on Colab's limited resources without running into memory issues. This technique significantly reduces the GPU memory allocation required during the loading process.
Now, you have learned how to use GPT-Neo 2.7B on Colab for free, even with the limited system resources available. The gradient checkpointing technique allows you to leverage the power of GPT-Neo and generate text without encountering memory constraints. Happy experimenting with GPT-Neo on Colab!


Add a Comment: